How to Print Gridlines in Excel?
Note: This tutorial on how to print gridlines in Excel is suitable for all Excel versions including Office 365.
Gridlines are faint grey lines that are visible around the cells of an Excel worksheet. These Gridlines define columns, rows, and cell boundaries in Excel. They help you visually differentiate between cells and read the data better.
When you print an Excel spreadsheet, these gridlines are usually discarded, presumably to save ink or reduce printing time. But, in some cases, you may want to keep them in the printed hard copy. Financial reports are a good example, where printing gridlines helps make sense of the data better.
Similarly, in some cases, it is advisable to switch off gridlines or edit them to see certain elements better. For example, if you are creating a dashboard, switching off the gridlines is very desirable to contrast the images or charts.
In this guide, I will show you how to print gridlines in Excel, and also how to remove gridlines in Excel.
You’ll learn:
- Borders vs Gridlines in Excel
- How to Change the Colour of the Gridlines in Excel?
- How to Print Gridlines in Excel?
- How to Remove Gridlines in Excel?
Related:
6 Easy Methods to Strikethrough in Excel
How to Delete a Named Range in Excel? 3 Easy Methods
How to Enable Excel Dark Mode? 3 Simple Steps
Borders vs Gridlines in Excel
Gridlines and borders are commonly confused and used interchangeably. However, there is a significant difference that you should know when using these features. Borders can be applied to any specific region of the worksheet, whereas gridlines are fixed to the entire worksheet.


Moreover, you can edit the cell borders by changing colours, width, or style and print them. On the other hand, gridlines are usually not edited or printed by default.
How to Change the Colour of the Gridlines in Excel?
Before we look at how to print gridlines in Excel, let us see how to change their colour first.
You can easily change the gridline colour in Excel, by following these steps.
- Open File > Options.


- Select the Advanced option in the left pane from Excel’s dialogue box.
- Scroll down and locate the Display options for this Worksheet section.
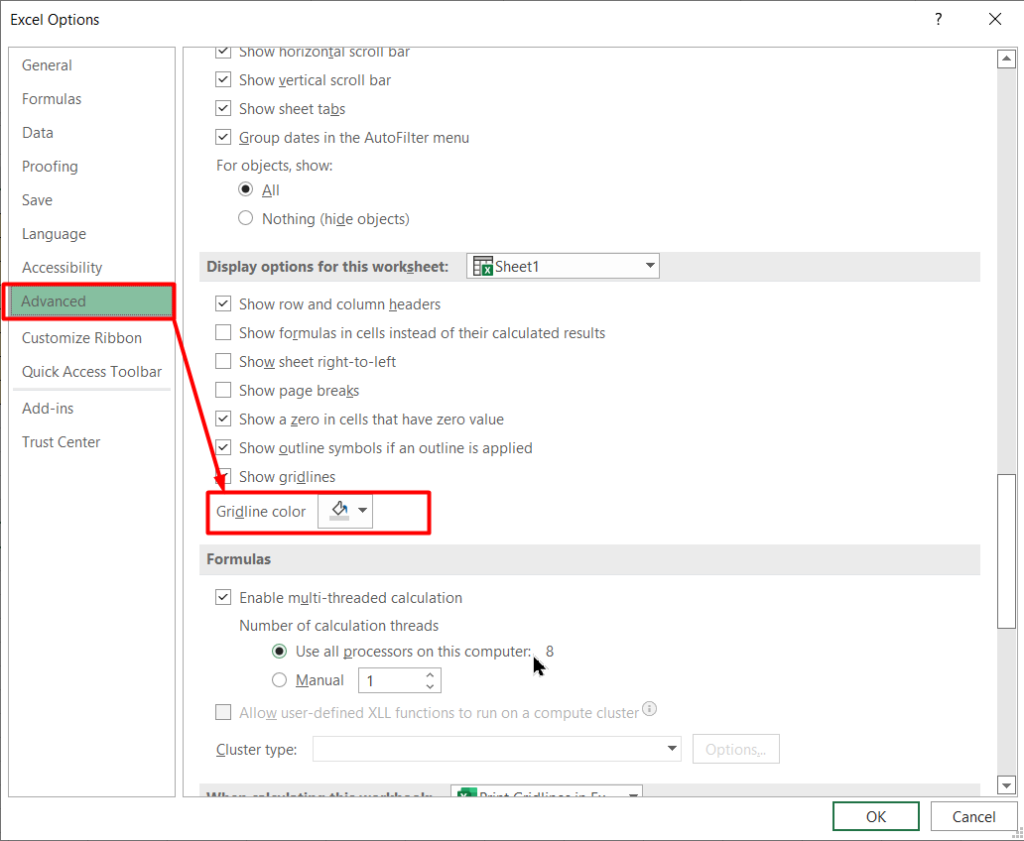

- Pick a colour from the Gridline colour picker near the bottom of the section and click OK.
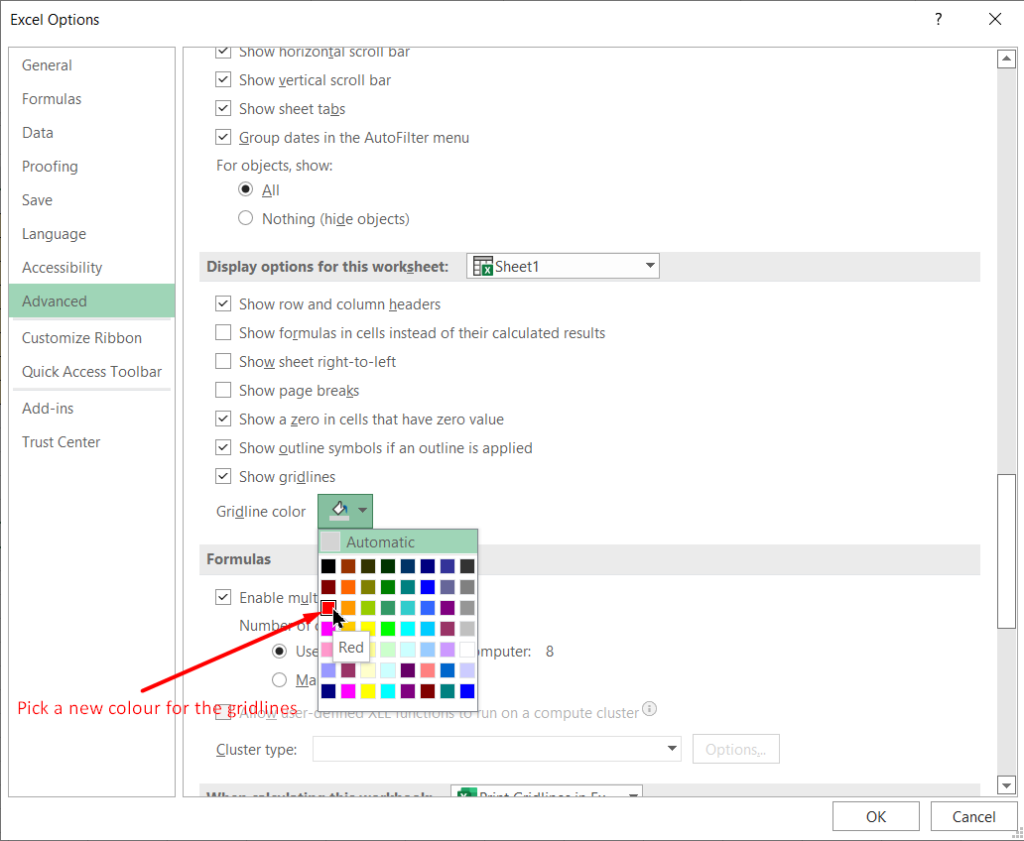

This will change the colour of the Gridline for the current worksheet.
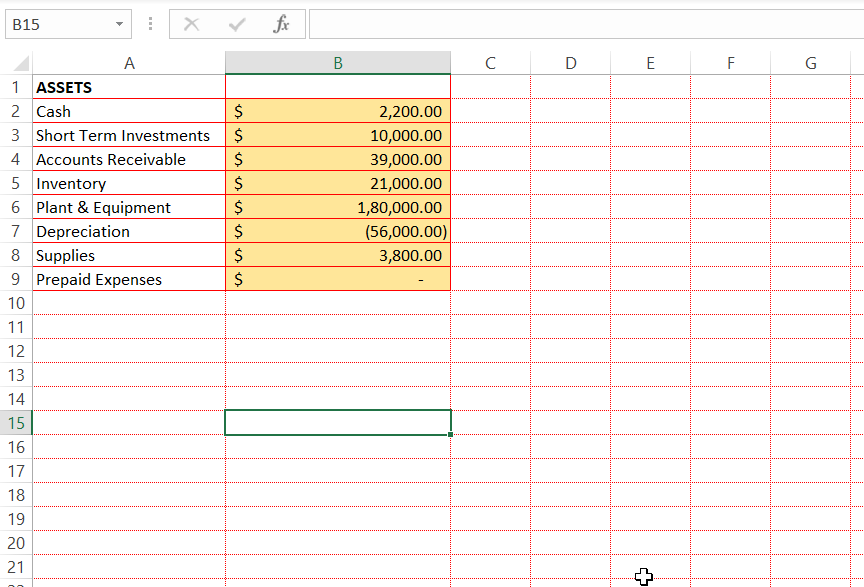

If you want to edit the Gridline colours of all the worksheets together, group them together before applying the colour changes.
After editing the colour, ungroup the sheets by right-clicking on the tab and select the Ungroup from the option.
Please keep in mind that these edits will not change the default colour of the Gridlines of Excel. If you are inserting a new worksheet, it will be in the same light grey colour.
Also Read:
How to Use Goal Seek in Excel? (3 Simple Examples)
How to Insert Multiple Rows in Excel? The 4 Best Methods
How to Autofit Excel Cells? 3 Best Methods
How to Print Gridlines in Excel?
The gridlines in Excel are usually not printed by default. However, if you really want to make the gridlines printed, there is actually a way to do that. Let us see how:
- Go to the Page Layout tab.
- Move to Gridlines within the Sheet options group.
- Check on the Print checkbox in the Gridlines.


Now print, as usual, using the Print option or Ctrl+P shortcut. All the gridlines will be printed in the hard copy of the spreadsheet.
How to Remove Gridlines in Excel?
By default, gridlines are always visible in the entire workbook.
You can remove the gridlines from the Excel worksheet using these steps:
- Go to the Page Layout tab.
- Move to the Gridlines section in the Sheet option group.
- Uncheck the View option within the Gridlines section.
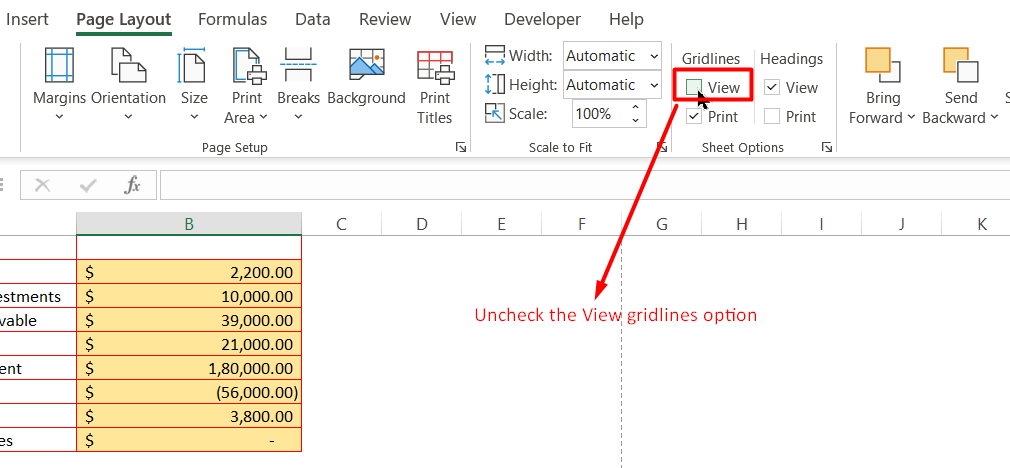

You can also remove gridlines using the keyboard shortcut combination ALT + P + VG.


Please keep in mind that removing gridlines is specific to each page. This means if you remove gridlines from one worksheet, it would still be visible in other sheets.
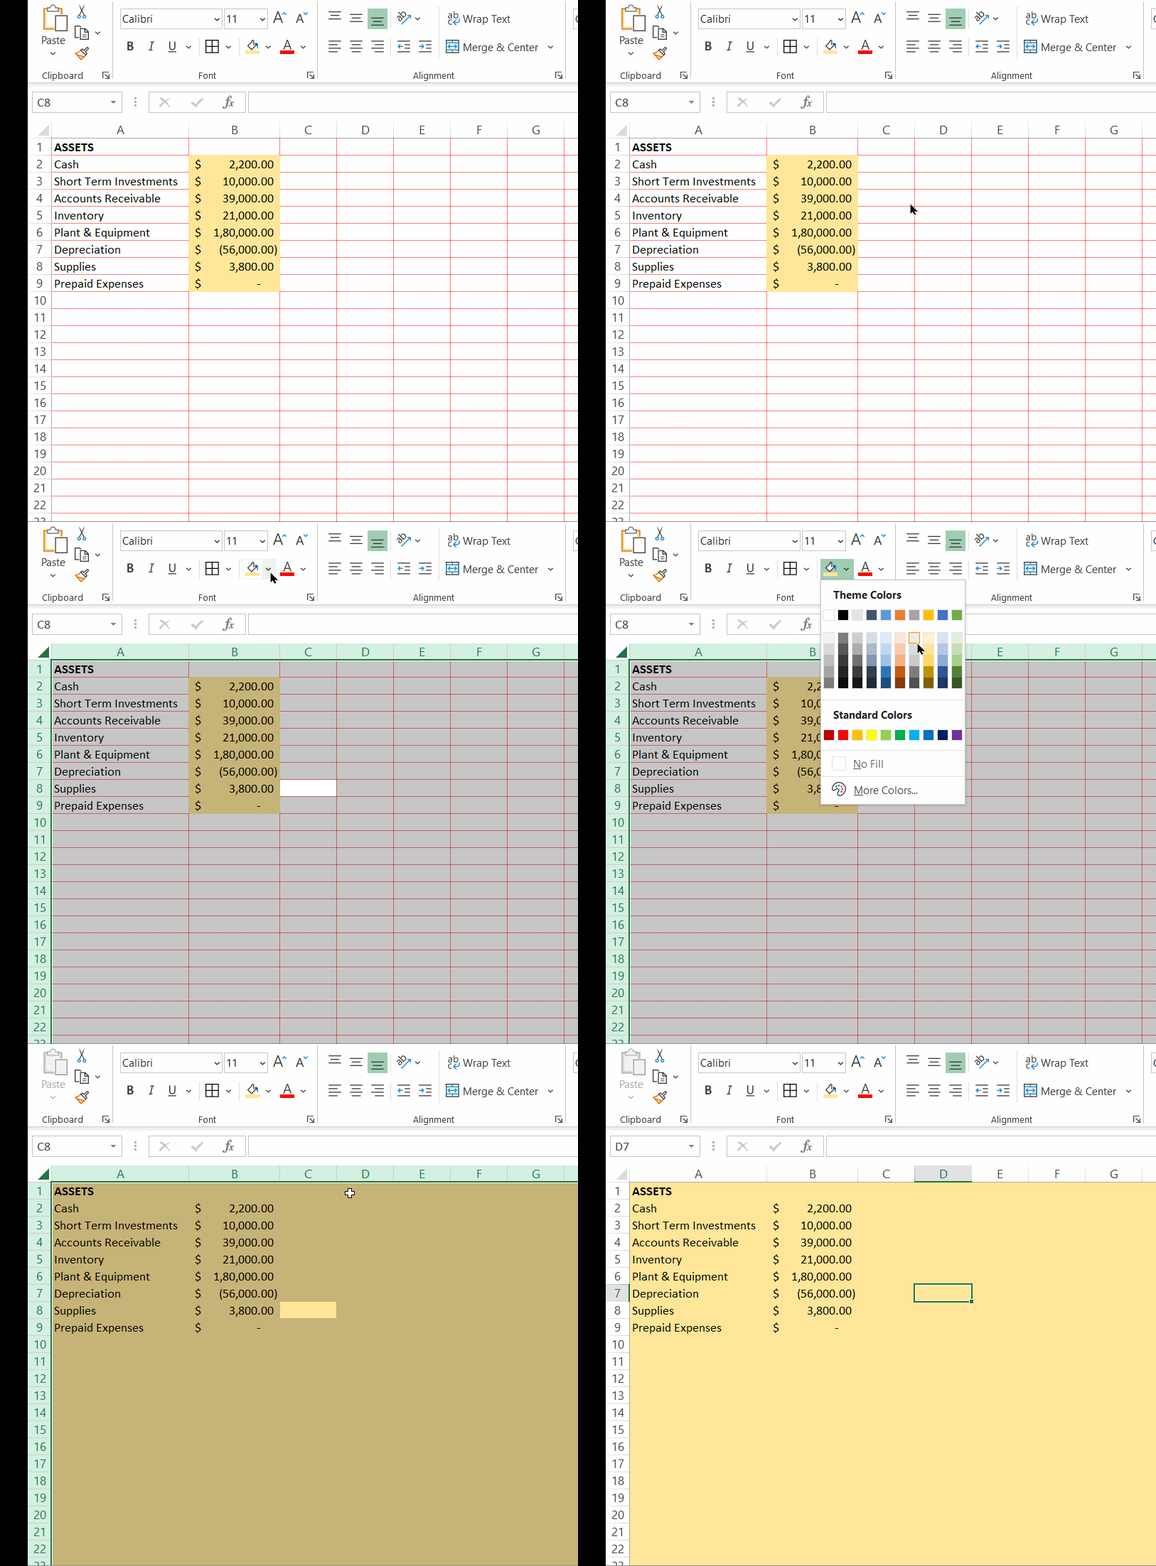
You can also make gridlines disappear using the fill colour feature in the Home tab. Just fill any suitable background colour to the entire sheet. This will make all the gridlines in the sheets invisible. Note that this will not deactivate the gridlines.

Suggested Reads:
How to Make a Pareto Chart Excel Dashboard? 4 Easy Steps
How to Make a Sankey Diagram Excel Dashboard? A Step-by-Step Guide
How to Use the NPER Excel Formula: 2 Easy Examples
FAQs
How To Remove Gridlines From All Worksheets?
You can switch off gridlines from multiple sheets by grouping them all at once. Here’s how:
Select any one worksheet and hold the Control Key while clicking on the remaining tabs. This will group all the selected worksheets together.
Uncheck the View Gridlines option in the Page Layout tab.
This will remove gridlines from the entire workbook.
After removing the gridlines, remember to ungroup the sheets. To do this, right-click on any of the tabs and select Ungroup from the option. If you forget to ungroup them, any changes made in one sheet will reflect in all other sheets in the group.
Is it Possible to Show Gridlines in a Specific Area in the Worksheet?
Gridlines cannot be displayed for a specific area in the worksheet. You have to either make it visible for the entire worksheet or hide it for the whole sheet.
But, you can replace it with borders to give a gridlines effect.
Borders, on the other hand, have a lot of editing options and can resemble the actual appearance of gridlines.
Let’s Wrap Up
That’s all folks. In this short guide, we explained how to print gridlines in Excel worksheets. We hope you find this guide useful. Try these techniques in a sample worksheet and let us know what you think.
Want more high-quality guides for Excel? Check out our free Excel resources centre.
Click here to access in-depth Excel training courses and master in-demand advanced Excel skills.
Simon Sez IT has been teaching critical IT software for over ten years. For a low, monthly fee you can get access to 100+ IT training courses by seasoned professionals.

