How to Make a Checklist in Word? 3 Simple Steps
(Note: This guide on how to make a checklist in Word is suitable for all MS Word versions including Office 365)
Checklists are very useful tools that are generally used to keep track of to-do lists or the progress of any project. From school days to our careers, most of us have used checklists in some form or the other.
But, have you ever wanted to create a checklist in a Word document, but found it confusing? If that is the case, don’t worry.
In this guide, I’ll show you how to create a checklist in Word in three simple steps.
You’ll learn:
- How to Create a Checklist in Word?
- How to Change the Default Checkbox Symbol?
- Lock the Checklist to Prevent Unwanted Changes?
- How to Create a Print Only Checklist in MS Word?
Related:
How to Track Changes in Word? A Step-by-Step Guide
How to Add Page Numbers in Word? 3 Easy Examples
How to Make a Checklist in Word?
Step 1: Activate the Developer Tab
The first step in creating a checklist in MS Word is to activate the Developer Tab. It is switched off by default.
To activate it, open the File tab and click on Options. Under the Customize Ribbon settings, locate the Developer tab and click on the check-box next to it.


Finally, click OK to save your changes.
Step 2: Create a List as Usual
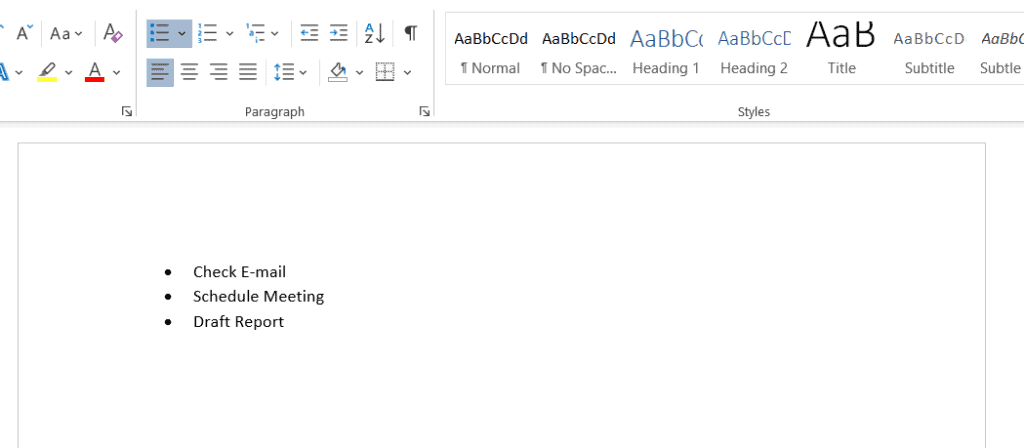
Type the checklist in the form of a bulleted list or a numbered list, whichever you prefer.

Step 3: Insert Checkboxes
Now that you have your list ready, it is time to insert the checkboxes. Place your cursor at the first bullet point.
Go to the Developer tab and click on the Checkbox icon in the Controls section. It will be labelled as “Check Box Content Control”.


This will insert a checkbox at your cursor’s location.
Finally, copy and paste the checkboxes wherever required.
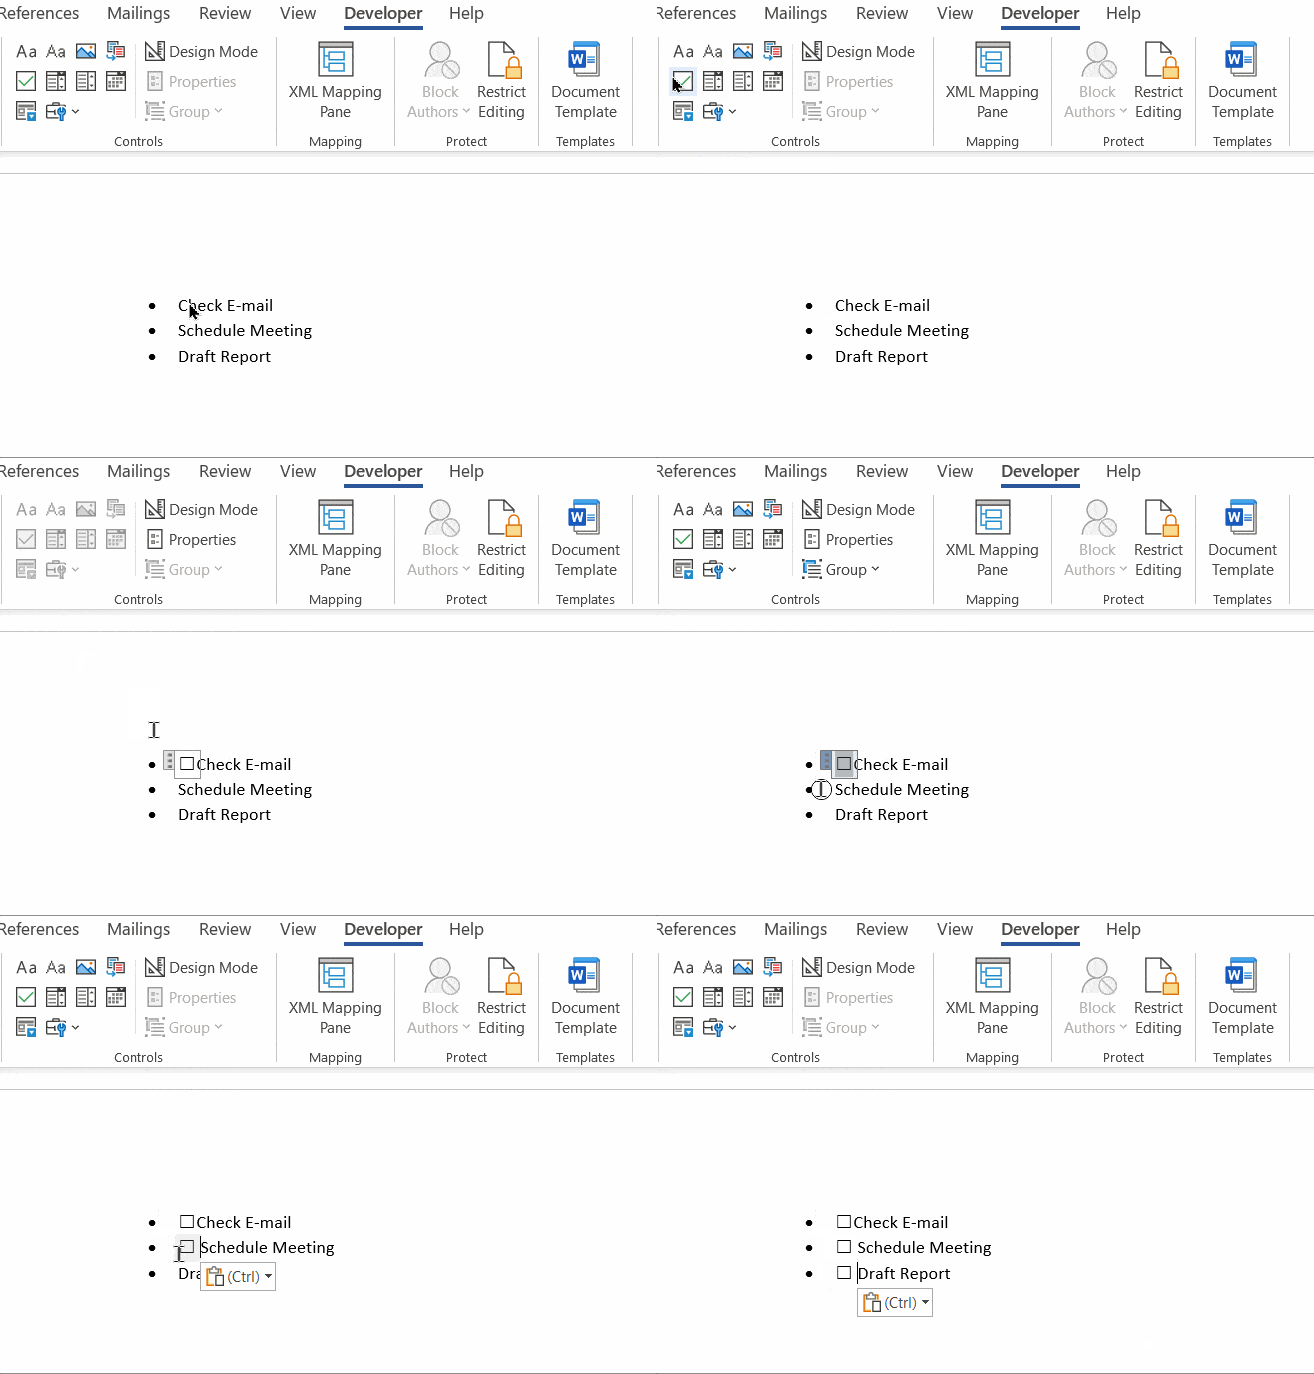

That’s all! Now, you can check or uncheck these tick boxes with a simple click.
Also Read:
Create and Update an Index in Word
Working with Page Breaks in Microsoft Word
How to Change the Default Checkbox Symbol?
In some cases, you may want to change the default checkbox symbol to some other character that you prefer.
To do this, follow these steps:
- Create a checkbox as usual by going to the Developer tab and selecting the Checkbox icon in the Controls section.
- Now, select the checkbox you just created and once again go to the Developer tab and click on the Properties option in the Controls section.


- In the Content Control Properties dialog box, click on the Change button next to the Checked symbol and Unchecked symbol options.


- Choose a suitable alternative symbol and click OK.
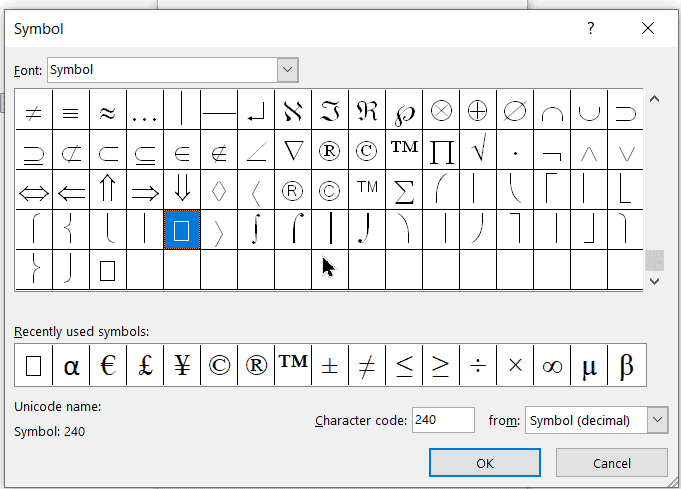

You have successfully changed the checkbox symbol. Now, copy and paste the modified checkbox wherever required.
How to Lock the Checklist to Prevent Unwanted Changes?
If you are sharing this checklist with other users, they may accidentally edit or delete the checkboxes or text.
To prevent this, MS Word actually allows you to lock the checklist and avoid such inadvertent changes.
Let us see how to do this:
- Create the checklist following the steps mentioned above.
- Select the Checklist along with the checkboxes.
- Go to the Developer tab and click on the Group option in the Controls section.
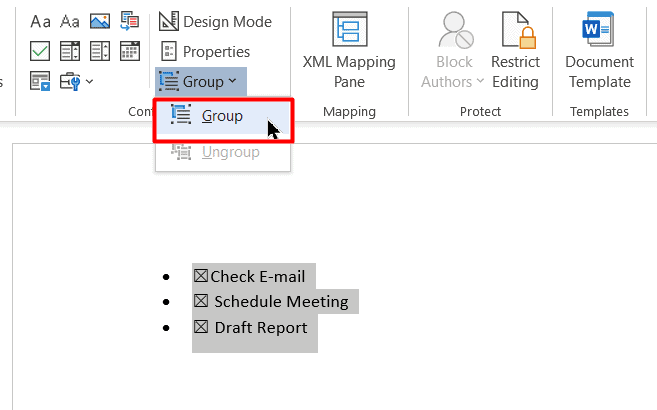

This will lock the checklist in place. No one will be able to make changes or delete it, except checking or unchecking the tick boxes.
To make changes, you have to use the nearby Ungroup option in the Developer tab.


How to Create a Print Only Checklist in MS Word?
If you are not planning to share this checklist with others for the sake of filling it, activating the Developer tab is unnecessary.
There is a much simpler way to create a checklist used only for printing purposes.
Let us see how to do this:
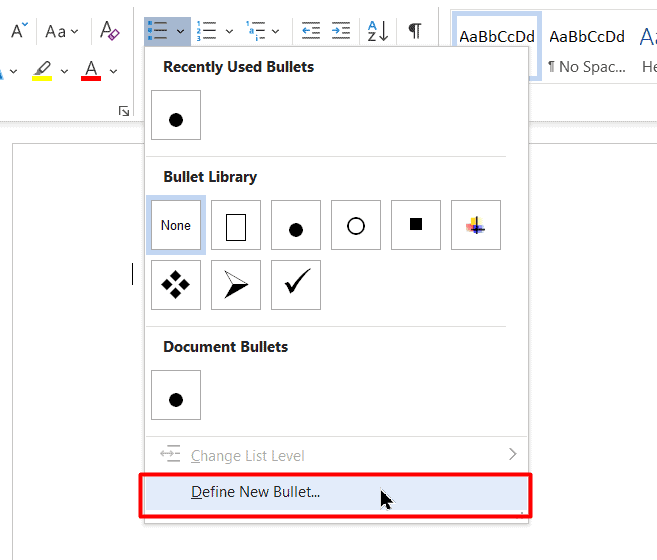
- In the Home tab, click on the drop-down button right next to the Bullets option.
- Now, select the Define New Bullet… option from the drop-down menu.

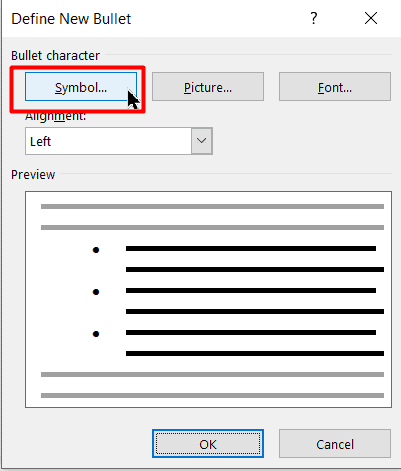
- This will take you to the Define New Bullet dialog box. From there, click on the Symbol option under the Bullet Character section.

- Here, scroll up or down and find a suitable box symbol, which will represent a checkbox.
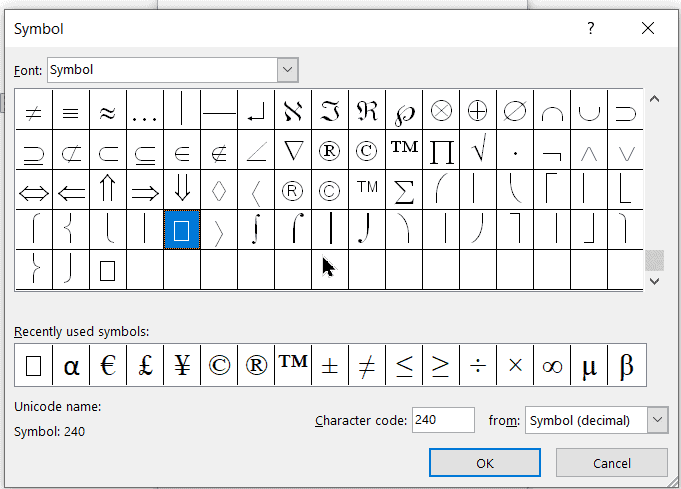

- Click OK and start creating your checklist as usual. Press Enter to type the next item in your checklist. Your checkbox will be automatically inserted.


Suggested Reads:
How to Shade Every Other Row in Excel? (5 Best Methods)
How to Extract an Excel Substring? – 6 Best Methods
How to Split Cells in Excel? 3 Easy Methods
Closing Thoughts
In this short guide, we saw how to create a checklist in Microsoft Word in three simple steps. We hope you found this guide helpful. If you have any questions, please let us know in the comments section.
For more high-quality guides on MS Word or Excel, please visit our free resources section.
SimonSezIT has been successfully teaching Excel for 15 years. We have a very exhaustive set of courses with in-depth training modules covering all major business software.
You can access all these 100+ courses for a low monthly fee. Please visit our courses section for more information.

