Simon Sez IT

Online software training and video tutorials for Microsoft, Adobe & more

  • Course List
    • Adobe
      • Dreamweaver
        • Dreamweaver CC
        • Dreamweaver CS6
        • Dreamweaver CS5
        • Dreamweaver CS4
      • Flash
        • Flash CS5
      • InDesign
        • InDesign CS6
        • InDesign CS5
      • Photoshop
        • Photoshop CS6
        • Photoshop CS5
        • Adobe Photoshop CS4
      • Photoshop Elements
        • Photoshop Elements 2022
        • Photoshop Elements 2019
        • Photoshop Elements 2018
        • Photoshop Elements 15
        • Photoshop Elements 14
        • Photoshop Elements 13
        • Photoshop Elements 12
        • Photoshop Elements 11
        • Photoshop Elements 10
        • Photoshop Elements 9
        • Photoshop Elements 8
    • Microsoft
      • Access
        • Access 2019
        • Access 2019 Advanced
        • Access 2016
        • Access 2016 Advanced
        • Access 2013
        • Access 2013 Advanced
        • Access 2010
        • Access 2010 Advanced
        • Access 2007
      • Excel
        • Excel 2021 Advanced
        • Excel 2021 Intermediate
        • Excel 2021 Beginners
        • PivotTables for Beginners
        • Excel Dashboards
        • Advanced Formulas in Excel
        • Excel for Business Analysts
        • Advanced PivotTables
        • Power Pivot, Power Query and DAX in Excel
        • Excel 2019 Beginners (Mac)
        • Excel 2019 Beginners
        • Excel 2019 Advanced
        • Excel 2016 Beginners
        • Excel 2016 Intermediate
        • Excel 2016 Advanced
        • Excel 2013
        • Excel 2013 Advanced
        • Excel 2010 Beginners
        • Excel 2010 Advanced
        • Excel 2007
      • OneNote
        • OneNote Desktop and Windows 10
        • OneNote 2016
      • Outlook
        • Outlook 2019
        • Outlook 2016
        • Outlook 2013
        • Outlook 2010
        • Outlook 2007
      • Power Automate
        • Introduction to Power Automate
      • PowerPoint
        • PowerPoint 2021
        • PowerPoint 2019
        • PowerPoint 2016
        • PowerPoint 2013
        • PowerPoint 2010
        • PowerPoint 2007
      • Project
        • Project 2019
        • Project 2019 Advanced
        • Project 2016
        • Project 2016 Advanced
        • Project 2013
        • Project 2013 Advanced
        • Project 2010
        • Project 2010 Advanced
      • Publisher
        • Publisher 2013
      • SharePoint
        • SharePoint Online
        • SharePoint Foundation 2013
        • SharePoint Server 2013
        • SharePoint Foundation 2010
      • Teams
        • Microsoft Teams
      • VBA
        • Macros and VBA for Beginners
        • VBA for Excel
        • VBA Intermediate Training
      • Visio
        • Microsoft Visio 2019
        • Visio 2016
        • Visio 2013
        • Microsoft Visio 2010
      • Windows
        • Windows 11
        • Windows 10 (2020 Update)
        • Windows 10
        • Windows 8
        • Windows 7
        • Windows Vista
      • Word
        • Word 2021
        • Word 2019 Advanced
        • Word 2019
        • Word 2016
        • Word 2013
        • Word 2010
        • Word 2007
    • QuickBooks
      • QuickBooks
        • QuickBooks Desktop Pro 2022
        • QuickBooks Pro 2021
        • QuickBooks Online Advanced
        • QuickBooks Online
        • QuickBooks Canada
        • QuickBooks Pro 2020
        • QuickBooks 2019
        • QuickBooks 2018
        • QuickBooks Pro 2017
        • QuickBooks Pro 2016
        • QuickBooks Pro 2015
        • QuickBooks Pro 2014
        • QuickBooks Pro 2013
        • QuickBooks Pro 2012
        • QuickBooks Pro 2011
        • QuickBooks Pro 2010
        • QuickBooks Pro 2009
    • Web Development
      • AngularJs
        • AngularJS Crash Course
      • Dreamweaver
        • Dreamweaver CC
        • Dreamweaver CS6
        • Dreamweaver CS5
        • Dreamweaver CS4
      • Bootstrap
        • Bootstrap Framework
      • Html/CSS
        • HTML/CSS Crash Course
        • HTML5 Essentials
      • Python
        • Pandas for Beginners
        • Introduction to Python
      • Java
        • Java for Beginners
      • JavaScript
        • JavaScript for Beginners
        • jQuery Crash Course
      • MySql
        • MySQL for Beginners
      • PHP
        • PHP for Beginners
        • Advanced PHP Programming
      • XML
        • XML Crash Course
    • Data Analysis
      • Financial Modeling
        • Financial Risk Management
        • Financial Forecasting and Modeling
      • Alteryx
        • Introduction to Alteryx
      • Power BI
        • Power BI – Beyond the Basics
        • Power BI
      • Qlik Sense
        • Qlik Sense
      • R Programming
        • R Programming
      • Tableau
        • Tableau Desktop Advanced
        • Tableau Desktop
      • Python
        • Pandas for Beginners
        • Introduction to Python
    • Work Productivity
      • Google Sheets
        • Google Sheets for Beginners
      • Confluence
        • Introduction to Confluence
      • Monday
        • Getting Started in Monday.com
      • Asana
        • Asana for Employees and Managers
        • Introduction to Asana
      • Jira
        • Getting Started in Jira
  • For Business
  • About Us
    • Testimonials
    • Contact Us
    • FAQ
    • Membership
    • About Us
  • Pricing
  • Free Resources
  • Sign In
  • Sign Up
Home > Microsoft Word > How to Mail Merge in Word

How to Mail Merge in Word

This Mail Merge in Word tutorial is suitable for users of Word 2010, 2013, 2016, 2019, and Word for Microsoft 365.  

Objective 

Perform a Mail Merge in Word to generate letters and labels in bulk using contacts stored in an Excel spreadsheet. 

Mail Merge Explained 

Do you need to generate lots of letters, envelopes, labels, or even emails? Let the Mail Merge feature in Word do the hard work for you.   

Mail Merge is a utility in Word that’s been around for a long time. It allows you to create letters, envelopes, and labels in bulk and customize each one for individual recipients. Use a list of contact names and addresses stored in an Excel spreadsheet, or type them in manually during the merge process.  

Mail Merge is a 5-step process: 

Method 

In this example, I am going to go through the process of creating letters in bulk using Word’s Mail Merge facility. These contacts are stored in an Excel spreadsheet.  

Set-up the Excel data file 

Before starting the mail merge, ensure that the Excel data file is set-up correctly.  

  • Data should be separated into different columns and have column headings. The columns must correspond to the merge fields to be used. For example, if you want to be able to address a recipient by their first name in the document, you’ll need to have separate columns for first and last name.  
  • Try and keep the data to be used in the merge on the first worksheet in the Excel workbook.  
  • The Excel spreadsheet should be stored on your local machine.  
  • Ensure the data is free from duplicates, blank rows, spelling errors, and addresses, postcodes, etc. are formatted correctly.  

Set-up the main document 

The main document is the document you are merging into, in this case, a letter.  

  1. Open a blank Word document or a letter template. 
  1. Type the letter you want to send to multiple recipients. 
  1. Click the Mailings tab. 
  1. Click Start Mail Merge. 
  1. Select Letters. 

Select the recipients 

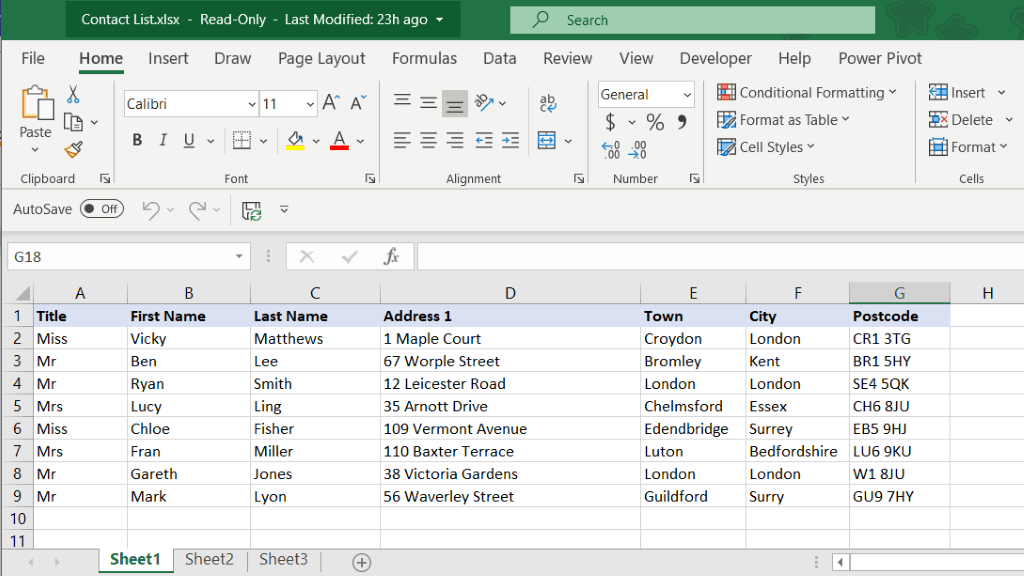
Word needs to know which recipients list you want to use and where it is stored. You can choose to type your list of recipients manually, use an existing list, or select from Outlook contacts. In this example, I have my contacts stored on Sheet 1 of the ‘Contact List.xlsx’ spreadsheet.  

  1. Click Select Recipients 
  1. Select Use an existing list 
  1. Browse to the location where you contact list is stored and click Open 

The Select Table window will open and show all the worksheets contained in the Excel spreadsheet. Ensure that you select the worksheet your contacts are stored in. If your column headings are in row 1 of the worksheet, ensure you have the ‘First row of data contains column headers’ checkbox ticked.  

  1. Click OK 

Edit the recipient’s list 

At this point, you can review your recipient’s list and make changes.  

  1. Click Edit Recipient List 

Your contacts will be listed. If you do not want to include them all in the mail merge, remove the tick next to their name. The refine recipients list area contains options to help you sort and organize your contact list. Sort contacts alphabetically, filter out contacts, find duplicate entries or specific recipients.  

  1. Click OK 

Insert the merge fields 

It’s now time to insert the merge fields into the letter. Merge fields are essentially the column headings from your source data file; in this case, the Excel spreadsheet. They are used to personalize each letter to the individual.  

In this example, I am going to add an address block to the top of the letter, a greeting line and an individual merge field in the body of the letter. Ensure that your mouse is clicked at the top of the letter.  

  1. Click Address Block on the Mailings tab 

Choose how you want the recipient’s name to be formatted. You can see what each option looks like in the preview pane on the right. Use the arrows to scroll through your contacts.  

If your contact list contains company names, ensure this option is ticked.  

  1. Click OK 

The first contact will display at the top of the letter. Preview how each contact looks by using the scroll arrows in the Preview Results group.  

Next, I am going to add a Greeting Line. Ensure your cursor is positioned just above the body of the letter.  

  1. Click Greeting Line 

Select a greeting of ‘To’, ‘Dear’ or ‘None’ from the Greeting line format drop-down menu.  

15. Click OK 

Next, I am going to personalize my letters further by adding an individual merge field to the body of the letter. I want the opening line of the letter to read ‘Thank you, Vicky, for your recent inquiry…’. 

  1. Position the cursor where you would like to insert the merge field 
  1. Click Insert Merge Field 

The merge field listed is the individual column headings from the Excel spreadsheet. You can use one or more merge fields together or separately to personalize the document.  

18. Select First_Name 

Completing the merge 

Once all the merge fields are added to the letter, you can complete the merge. You can choose to send the merged letter directly to print directly to email recipients, or you can choose to view the merged letters before choosing what action to take.  

  1. Click Finish and Merge 
  1. Select Edit Individual Documents 
  1. Merge All Records 
  1. Click OK 

Word will create a letter personalized to each individual in your contact list. 

Video Tutorial 

To see Mail Merge in action, please watch the following video tutorial.  

How to Mail Merge in Word (11:36) 

For more Free Microsoft Office tutorials from Simon Sez IT. Take a look at our MS Office Resource Center.

To learn Word with Simon Sez IT. Take a look at the Word courses we have available.

Deborah Ashby

Deborah Ashby is a TAP Accredited IT Trainer, specializing in the design, delivery, and facilitation of Microsoft courses both online and in the classroom. She has over 11 years of IT Training Experience and 24 years in the IT Industry. To date, she's trained over 10,000 people in the UK and overseas at companies such as HMRC, the Metropolitan Police, Parliament, SKY, Microsoft, Kew Gardens, Norton Rose Fulbright LLP. She's a qualified MOS Master for 2010, 2013, and 2016 editions of Microsoft Office and is COLF and TAP Accredited and a member of The British Learning Institute.

30 day vertical banner

Most Popular Posts

  • How to Insert a Checkbox in Excel? 3 EASY Examples
  • How to Autofit Excel Cells? 3 Best Methods
  • XLOOKUP Google Sheets – 4 Best Alternatives!
  • Dashboards in Excel Using Pivot Tables, Pivot Charts and Slicers
  • Free Microsoft Project Training Course
  • Free Microsoft Access Tutorial for Beginners (3.5 Hours Video)
  • How to Use Blending Mode With Layers in Adobe Photoshop Elements 15
  • How to Create Charts and Graphs in Microsoft Excel 2016

Similar Posts

How to Create Excel Drop Down List With Color?

How to Superscript in Excel? (9 Best Methods)

How to Use the Excel Fill Handle Easily? (Top 3 Uses with Examples)

How to Calculate Percentile in Excel? 3 Useful Formulas

How to Fix the #Div/0 Error in Excel? 2 Easy Methods

Setting Constraints and Deadlines in Microsoft Project 2016

Course Categories

  • Web Development
  • QuickBooks
  • Microsoft
  • Adobe
  • Data Analysis

About Us

  • About Us
  • Free Resources
  • Affiliates
  • Become an Instructor

Products

  • Pricing and Plans
  • Business Pricing
  • Government Discounts
  • Non-Profit Discounts

Support

  • FAQ’s
  • Contact Us
  • DVD support

Connect

YoutubeFacebook
© 2022 Simon Sez IT, Inc.
  • Terms
  • Privacy Policy
888.817.6665 Monday thru Friday 7:30 a.m. - 5:00 p.m. (ET)