
How to Set Out Of Office in Outlook App? 2 Easy Methods
(Note: This guide on how to set out of Office in Outlook App is suitable for Outlook versions 2013 and later including Office 365.)
Imagine this: You are on leave for a couple of days and don’t want to be bothered by work e-mails on vacation. In some cases, you may not be able to check or respond to emails immediately. But, on the other hand, not acknowledging emails for a prolonged period may be considered unprofessional.
Do you want to avoid this? Then, switch on the out-of-office feature in your email inbox when you are on leave and enjoy your vacation uninterrupted.
The Out-of-Office status is used to notify people that you are temporarily on leave or absent from the office. If the sender has to send any urgent mail that requires your response or wants to connect with you for any important matter, your status lets the sender know you are out of the office.
Also, you can set your out-of-office status with a message stating your reason for absence, when you will be back and any important things to be taken care of in your absence.
In Outlook, there are two ways to set your out-of-office status depending on the type of your account.
Only certain types of accounts have the automatic replies option where you can easily set up the automatic replies. But, in some accounts, there is no automatic reply option. For such instances, you can use the rules to automatically reply when you are out-of-office.
In this guide, I will show you how to set your status to out-of-office in Outlook App and send response mails in your absence.
Let’s get started.
- Method 1 – How to Set Out of Office in Outlook App Using Automatic Replies?
- Method 2 – How to Set Out of Office in Outlook App Using Rules and Template?
Watch this short video to learn how to Set Out of Office in Outlook
Method 1 – How to Set Out of Office in Outlook App Using Automatic Replies?
If your mail has the Automatic Reply option, then setting out-of-office status is relatively easy.
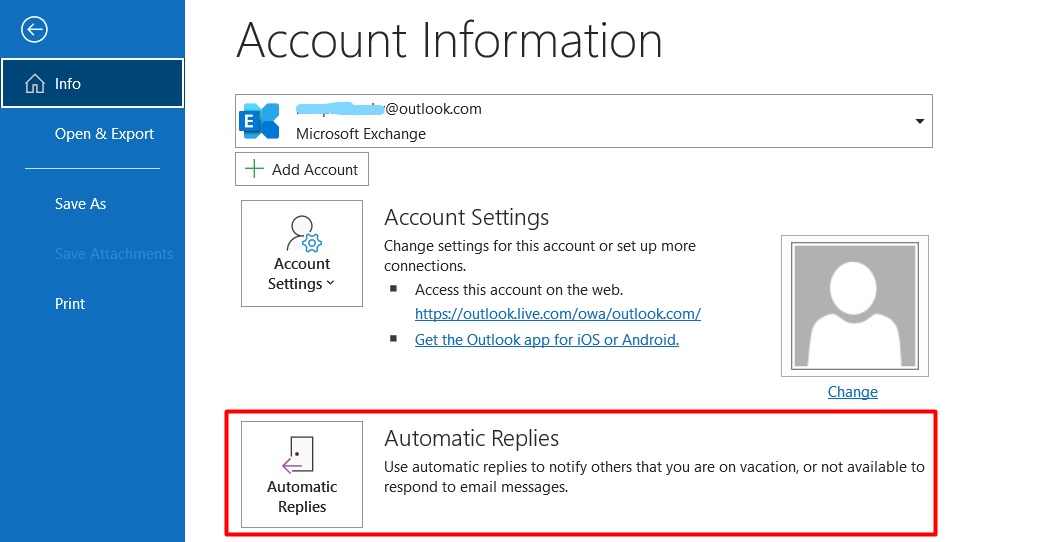
Open your Outlook application. Click on File > Info and check if you have an option for Automatic Replies (Out-of-Office).
If you have the option, follow the below steps to set up your out-of-office status.
- Click on Automatic Replies.
- Select “Send automatic replies”. This enables you to set the factors for your out-of-office status.
- You can set the time range you want your out-of-office status to be activated. You can also customize and personalize the message you want to send as a reply.
- Click OK.

This enables your status to be out-of-office. If anyone sends you any mail during the specified time, Outlook automatically sends a response mail telling them your out-of-office status.
You can see if your out-of-office is enabled from your Outlook inbox.
Click on Turn off to change your out-of-office status to Off.

Method 2 – How to Set Out of Office in Outlook App Using Rules and Template?
If you don’t see the Automatic Replies option when you click on File, do not worry. There is another way. Follow the steps given below to enable the out-of-office status and response emails.
While using this method, you have two main steps. You will have to create a template and then set up the rules for out-of-office.
First, let us see how to create a template.
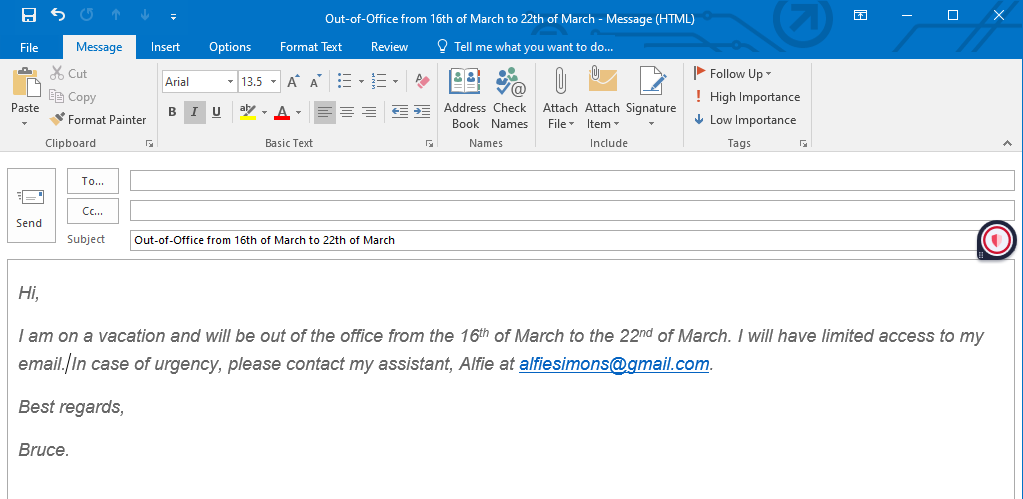
Step 1 – Create a Template for Out-of-Office Email
In Outlook, create a New Mail and draft your Out-of-Office response. Type in the subject and the body of the letter.
Click on File > Save As. and rename the template. Click on the dropdown and save the draft as an Outlook Template.
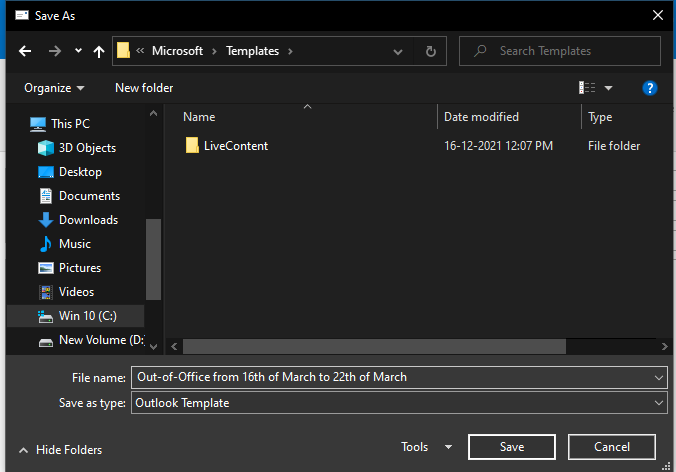
This is saved as a template. You can create new templates or resume with the old ones when setting up the rules.
Now, that you have the template ready. Let us set up the rules.
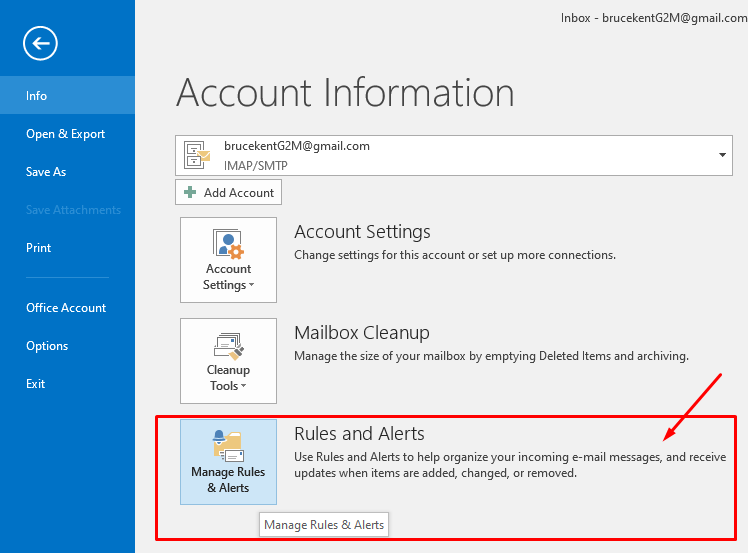
Step 2 – Set Rules for Out-of-Office Emails
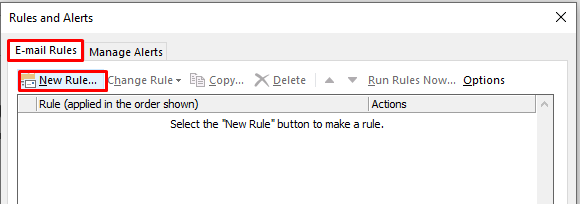
Click on File > Info and click on Manage Rules and Alerts
Click on E-mail Rules and click New Rule
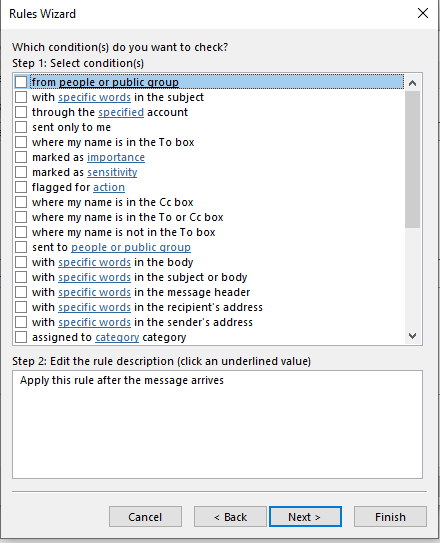
A new dialog box called Rules Wizard opens. Click on the Apply rule on messages I receive, and click on Next.

This opens another dialog box. In step 1, leave the checkboxes empty in “Which conditions do you want to check?” and click on Next.
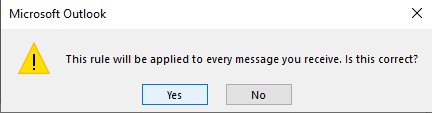
Excel throws a popup saying “This rule will be applied to every message you receive”. Click Yes.
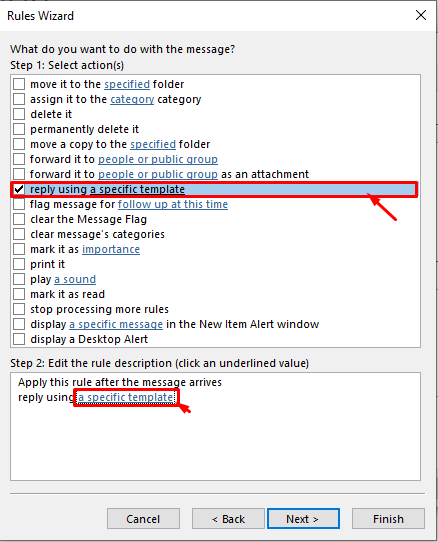
This will lead to the next question “What do you want to do with the message?” Select reply using a specific template. And, in step 2: click on the underlined “a specific template”.
Clicking on the “ specific template” hyperlink will take you to another dialog box. From the Look-in dropdown, click on User Templates in File System.
Select the template you want to add and click on Open. Click on Next.

In the next dialog box, select any exceptions for the rule to apply. If there are no exceptions, let all the boxes be unchecked and click on Next.

This takes us to the final step of the Rules Wizard. If you want to turn on the rule now, check the checkbox for “Turn on this rule”. You can also turn on the rule later. Click on Finish.

Click OK.
Now, the template and the rules are set up. You can toggle the rule on to set your status as out-of-office according to your needs.
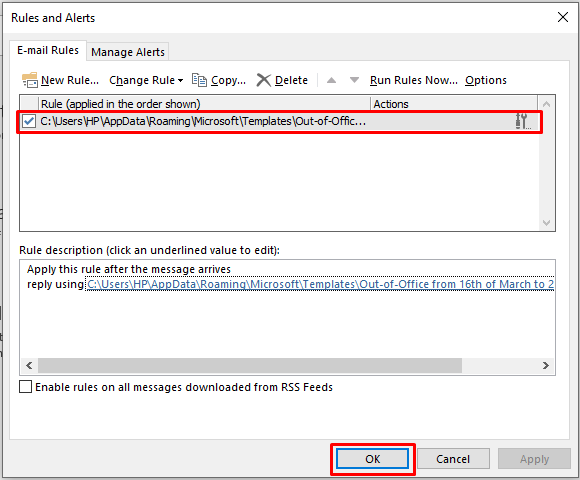
To set out-of-office, go-to File> Info > Manage rules and alerts.
Under E-mail Rules, check your rule and click on OK.
That’s all. You have successfully set up your out-of-office status. If anyone sends you an email while you are unavailable, they will get an automatic response saying you’re out-of-office with your custom reply.
Closing Thoughts
In this article, we saw how to set out of office in Outlook App. We saw how to enable the out-of-office status if your email has an automatic reply option. We also saw how to enable automatic replies by using templates and setting custom rules. Use this feature when you are on leave and enjoy your vacations worry-free.
If you need more high-quality guides, please check out our free resources center.
Ready to dive deep into Excel? Simon Sez IT has been teaching Excel for over ten years. For a low, monthly fee you can get access to 100+ IT training courses.
Simon Calder
Chris “Simon” Calder was working as a Project Manager in IT for one of Los Angeles’ most prestigious cultural institutions, LACMA.He taught himself to use Microsoft Project from a giant textbook and hated every moment of it. Online learning was in its infancy then, but he spotted an opportunity and made an online MS Project course - the rest, as they say, is history!
