
How to use EDATE in Excel? 11 Easy Examples
(Note: This guide is on how to use EDATE in Excel and is suitable for all Excel versions including Office 365)
EDATE is a built-in function in Microsoft Excel that falls under the category of DATE and TIME functions. The Excel EDATE function returns the date on the same day of the month, n months in the past or future as mentioned in the function.
You’ll Learn:
- EDATE in Excel – Syntax
- Few Months From Today
- Few Years From Today
- End of Month
- YEARFRAC() Function
- EDATE with other Functions like COUNTIF
- EDATE Errors
EDATE is used to calculate expiration dates, maturity dates, or due dates that fall on the same day of the month as the date of issue, but a few years later.
Related Reads:
How to Use AVERAGEIF in Excel? With 5 Different Criteria
How to Calculate Factorial in Excel? Along with 2 Easy Examples
How to Count Unique Values in Excel? 3 Easy Ways to Count Unique and Distinct Values
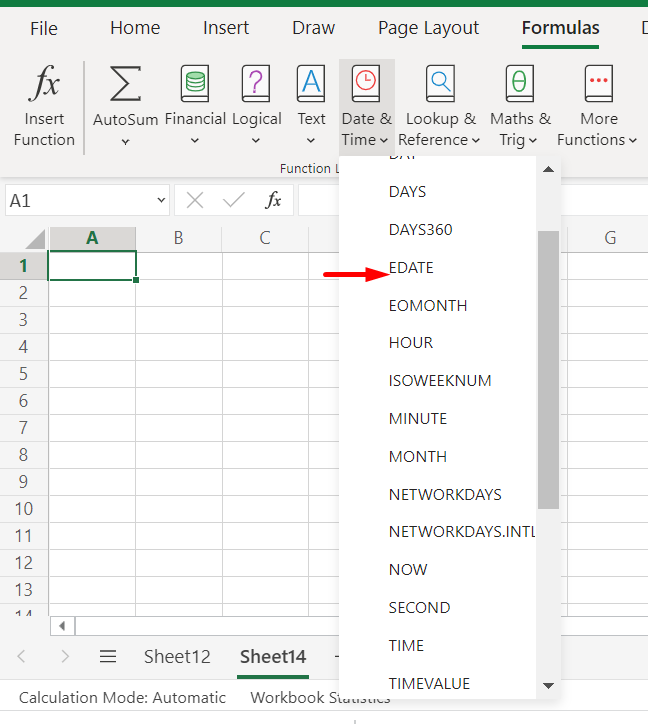
EDATE in Excel – Syntax
| =EDATE(start_date, months) |
It has two arguments:
Start_date – represents the date to be considered.
Months – represents the number of months before or after start_date.
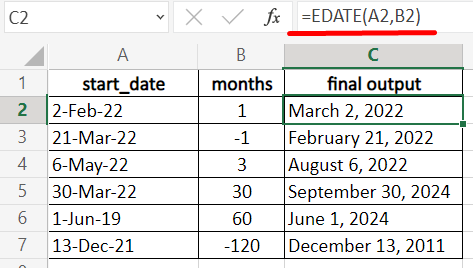
A positive value returns a future date and a negative value returns a past date. For example, in the table below, you can see that the arguments start_date and months are in columns A and B, and the corresponding result is in column C.
Few Months From Today
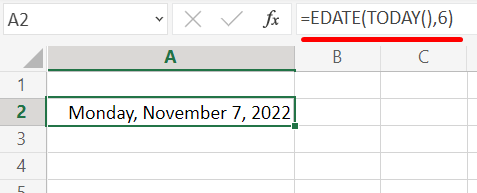
The formula =EDATE(TODAY(),6) returns the date six months from 7-May-2022. Here, the function TODAY() gets the current date.
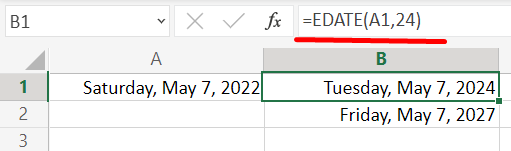
From the example below, the formula =EDATE(A1,24) returns 24 months from the given date. The date to consider is given in column A.
Few Years From Today
EDATE function returns a date after or before a few years. To get a date five years after May 7, 2002, the formula must include criteria that multiply the number of years by twelve months.
The formula =EDATE(A1,5*12) returns the date five years from the given date.

The same formula can be used in this way too, as =EDATE(A1,60), where 60 represents the total number of months in five years.

End of Month
EDATE can roll to the end of the month either forward or backward and will adjust the corresponding year, month, and dates. The EDATE function will maintain the end of the month as either 30 or 31 if the given date also has the last date of the month as either 30 or 31.
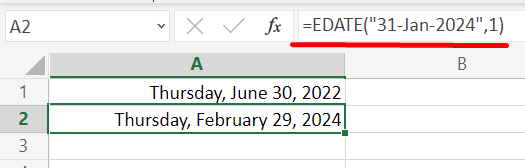
The formula =EDATE(“31-May-2022”,1) returns the date of the end of the month.

The EDATE function is smart enough to recognize a leap year and return the date accordingly. The formula =EDATE(“31-Jan-2024”,1) returns the last date of the month of February which is 29 days as 2024 is a leap year.
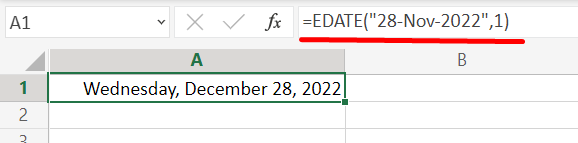
However, the formula =EDATE(“28-Nov-2022”,1) will not maintain the end of the month and just return the date that is a month apart.
Also Read:
How to Sort Dates in Excel? 6 Easy Methods
How to Convert Text to Numbers in Excel? 5 Easy Methods
How to Use the ROUND Function in Excel?
YEARFRAC() Function
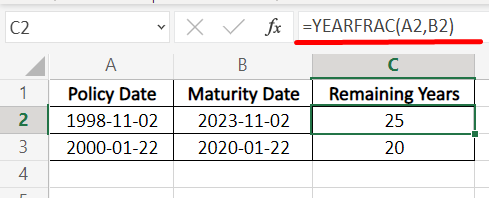
The YEARFRAC () returns the number of days/months/years between the two dates mentioned. The formula =YEARFRAC(A2, B2) returns the remaining years between the two dates.
Syntax
| =YEARFRAC(start_date, end_date, [basis]) |
It takes the following arguments:
Start_date – This argument takes the starting date for calculation.
End_date – This argument takes the end date for calculation.
[basis] – It is an optional argument and takes values 0-4.
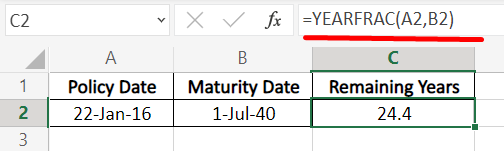
The YEARFRAC() can return the remaining dates in decimal format too. In the example below, the formula =YEARFRAC(A2, B2) returns the remaining years and months.
EDATE with other Functions like COUNTIFS
In the example below, there is a list of due dates in column B and a tracker table that counts the number of payments due for each month.
The date in column F is the date for the first of each month from January to March in 2022. Use the COUNTIFS function to count the number of payments in each month. The COUNTIFS function applies one or more criteria to cells in multiple ranges and counts the number of times all the criteria are met.
The actual date is available in column F, so you can construct the formula using this date itself and the second date using the EDATE function. These two criteria appear inside COUNTIFS like, =COUNTIFS(B2:B4,”>=”&F2, B2:B4,”<”&EDATE(F2,1)).
This formula is understood to count the number of dates greater than or equal to the date in F2 and less than the date in F2 plus one month and return them. The formula is copied down through the entire column G so that it generates the correct count for each month.
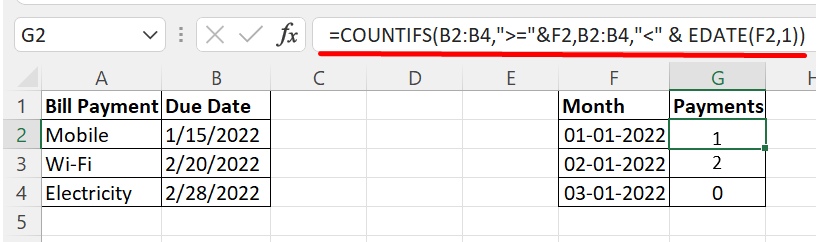
The tracker table is in the range F2 to G4 which tracks the payments to be done for each month. For the month of January, there is one payment due date and for the month of February, there are two payment due dates. Similarly, there is no data for the month of March that is available in this table, therefore in cell G4, the payment column returns 0.
EDATE Errors
The common errors that you get in the EDATE function may be one of the following:
#NUM! – caused by an invalid argument in an Excel function or a formula that produces a number too large or too small to be represented in the worksheet.
For example, Excel handles numbers in the range -of 1*10^308 and 1*10^308. Excel displays a #NUM! error message for any number that is outside this range.
#Value! – This error occurs if the supplied date is not a valid date and the month’s argument is non-numeric.
Suggested Reads:
The 7 Golden Rules of Excel Spreadsheet Design
How to Group in Pivot Table? ( 2 Easy Methods)
How to Fix the Excel NAME Error? 3 Simple Tips
Closing Thoughts
In this guide, we saw how to use EDATE in Excel. We also saw how to use the YEARFRAC() function and also combine EDATE with functions like COUNTIFS. Learning these functions will help you to work with ‘dates’ in Excel easily. You can try using them and learn as you practice them.
If you need more high-quality Excel guides, please check out our free Excel resources center.
Simon Sez IT has been teaching Excel for over ten years. For a low, monthly fee you can access 130+ IT training courses. Click here for advanced Excel courses with in-depth training modules.
Simon Calder
Chris “Simon” Calder was working as a Project Manager in IT for one of Los Angeles’ most prestigious cultural institutions, LACMA.He taught himself to use Microsoft Project from a giant textbook and hated every moment of it. Online learning was in its infancy then, but he spotted an opportunity and made an online MS Project course - the rest, as they say, is history!
